
I love balloon crafts. Not only are they simple and cheap, but they also allow for creativity and can be played with. Balloon birds are no exception; in fact, they are one of my favorite activities (to do with little ones and big ones) at parties, on rainy days, and of course for spring and Easter crafting!
 Balloon birds can be as simple, or as complex, as you wish. Additionally, they don’t require a lot of preparation (unless you want to get super creative). Children can be fully involved in making them and they can invent their own rules. Best of all, balloon birds are super versatile you and/or the kids can:
-
Create your own faces and body parts
-
Position them wherever you like on the balloon
-
Play a dice game to win different materials/body parts (for example: 1 = balloon, 2 = beak, 3 = wings, etc…)
-
Make them collaboratively or alone
-
Devise a Balloon Hunt game
-
Put small bells or beans inside the balloons so that they make music
-
Get creative and play!
Once completed, the balloon bird is a wonderful toy for children to play with. Kids love flying, feeding, and even cuddling their birds!
Here’s a free Balloon Bird Printable, which includes a template for the pieces you need; they are just a guide so go ahead and experiment.
How to make balloon birds
If you are doing this craft with a large group, it may be easier to complete the first three steps beforehand and let the children choose which parts/colors they would like. For a one-to-one activity or a small group, the children can participate throughout.

Download FREE Printable here
-
Step 1
-
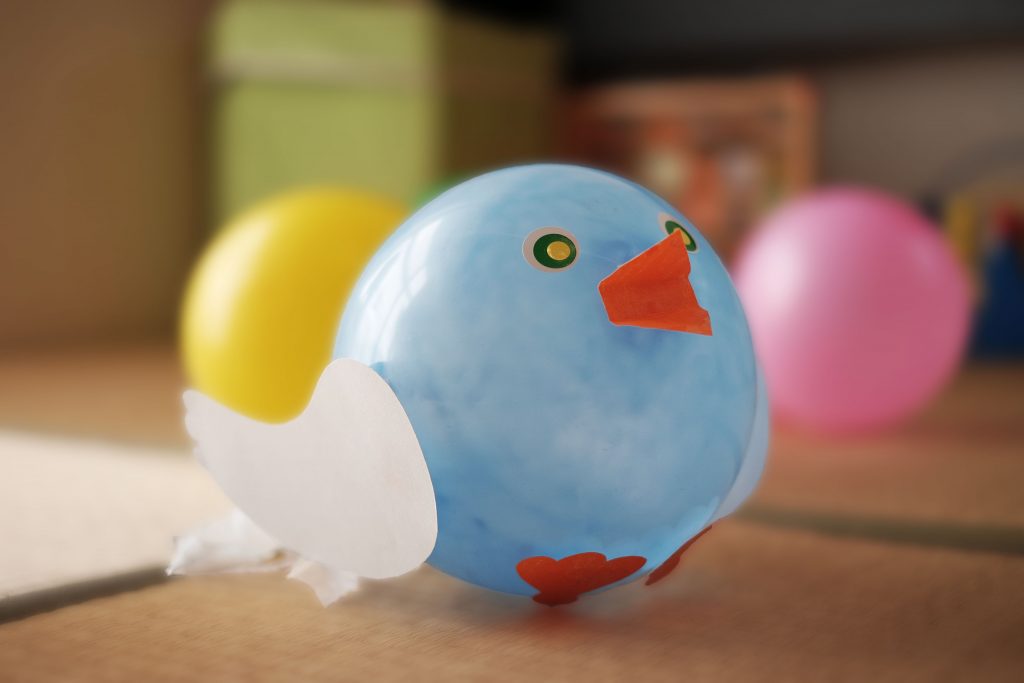
Trace or draw the wings, feet, and beak on whatever paper you have on hand.
-
Step 2
-
Cut out the shapes
-
Step 3
-
Blow up one balloon per child
-
Step 4
-
Use double-sided tape to stick the wings, beak, and feet on the balloon*
-
Step 5
-
Make eyes – use stickers, markers, or whatever else takes your fancy
-
Step 6 (optional)
-
Add a tail. I like using old plastic bags cut into strips and tied to the balloon; it looks good and makes a fun noise.
-
Step 7
-
Play!!!
* Remind children (and yourself) that attempting to reposition stuck on body parts may cause the balloon to pop!
Tips
-
For younger children, prepare all the pieces in advance then they simply need to choose and stick the body parts on the balloon. Older children might enjoy creating their own.
-
Let the children make choices: what color, where to position body/face parts, etc… Accuracy doesn’t matter; aim for creativity.
-
The children can design the wings and other body parts. They can scribble, draw, paint, add stickers, etc…
-
To help prevent accidental popping, soften the balloons. Inflate each balloon as much as you dare then partially deflate before tying.
-
Have extra balloons on hand, just in case!
-
Give ownership. Children can be supported to do as much as possible by themselves. It doesn’t need to be perfect, it needs to be theirs!
-
Make it seasonal! Make chicks for spring or add a snood and wattle to make a turkey for Thanksgiving or Christmas.
-
Create other balloon animals
Why not share your own ideas and results in the comments? It’d be so cool to see what your kids have achieved.